Setting Up Inventory
Set up inventory locations and keep track your inventory items.
If you have locations where you keep track of inventory (e.g. Technician Vans, Warehouse, Storage Unit, etc), you can set these up, add inventory items, and record inventory in OwlOps tasks.
To set up Inventory, follow these steps:
Steps:
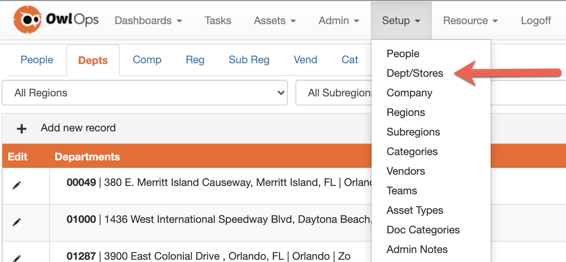
- Go to Setup / Departments. If you want to change one of your existing locations to enable inventory, skip to step 3.
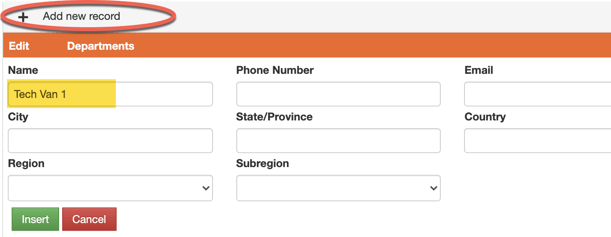
- At the top of the page, select Add New Record. Enter the name of where your inventory is tracked (e.g. Tech Van 1, Warehouse).
- After inserting, select Details.

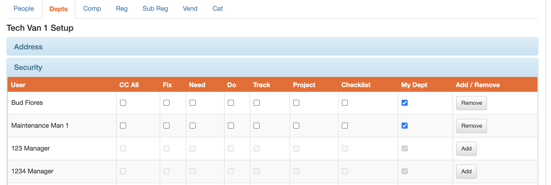
- Under the Security dropdown, select the people who should have access to the inventory department.
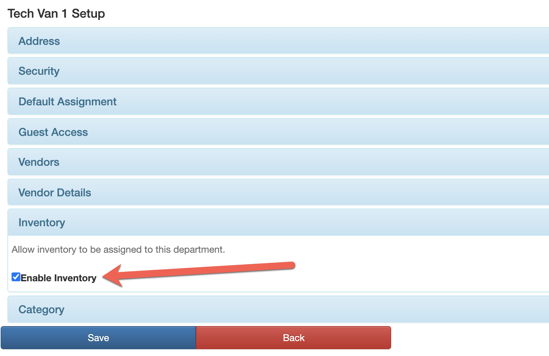
- On the same page, under the Inventory dropdown, select the Enable Inventory checkbox.
- If Inventory doesn't already exist under the Assets dropdown, go to Setup/Asset Types.
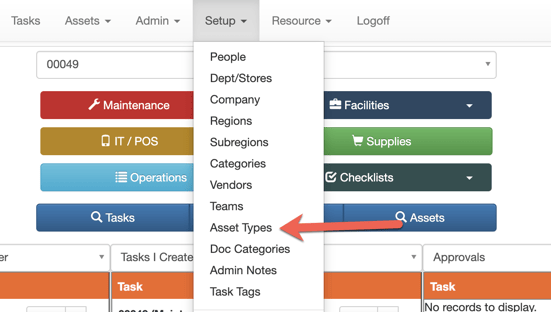
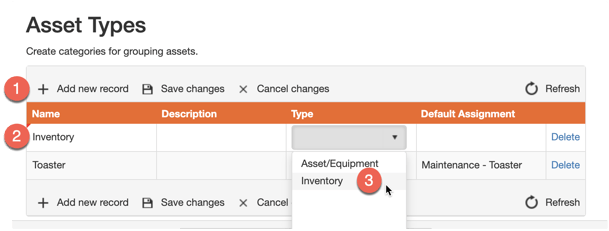
- Create an Asset Type called Inventory and set the Type as Inventory.
- To add specific pieces of inventory, go to Assets/ Inventory and +Add New Record. Enter as much information possible on the form and Insert.
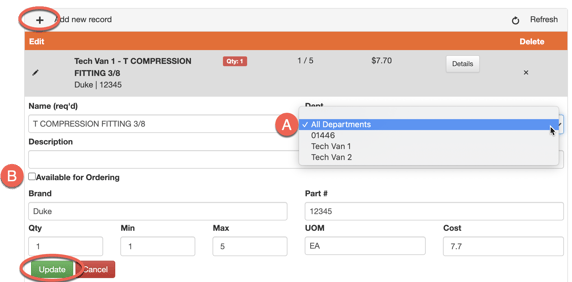
A. Recommended: All Departments - This will add and new piece of inventory across all locations where inventory is enabled. If the inventory is only in a specific location, select here.
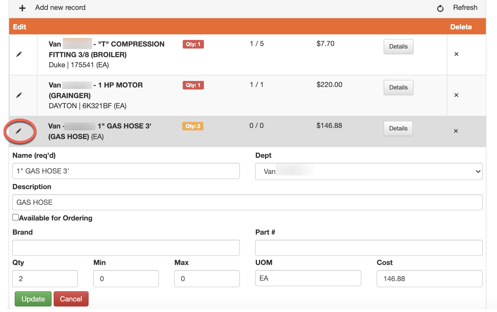
B. Available for Ordering: If this is enabled, it will pop up on your "Need" dropdown and you can request the item to be ordered (e.g. Uniforms, Deposit Slips, etc). - To update inventory quantities or costs, select edit on any of the items and adjust.
- When completing a task where inventory is used, users that have access to the inventory department will now be able to select from the inventory that was added and it will be decremented from the overall inventory quantity.
Note: If you have a bulk file or list of inventory that you want imported, email support@owlops.com