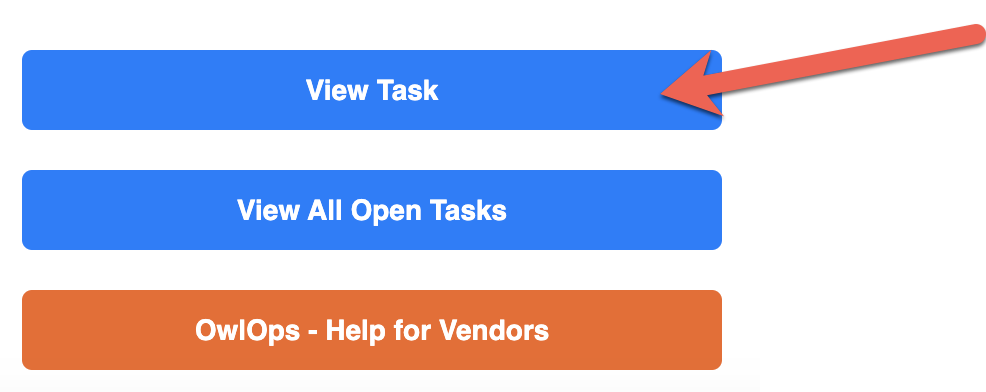
Step 1: View the Task in Your Account
View the work order request which will take you to your OwlOps account.
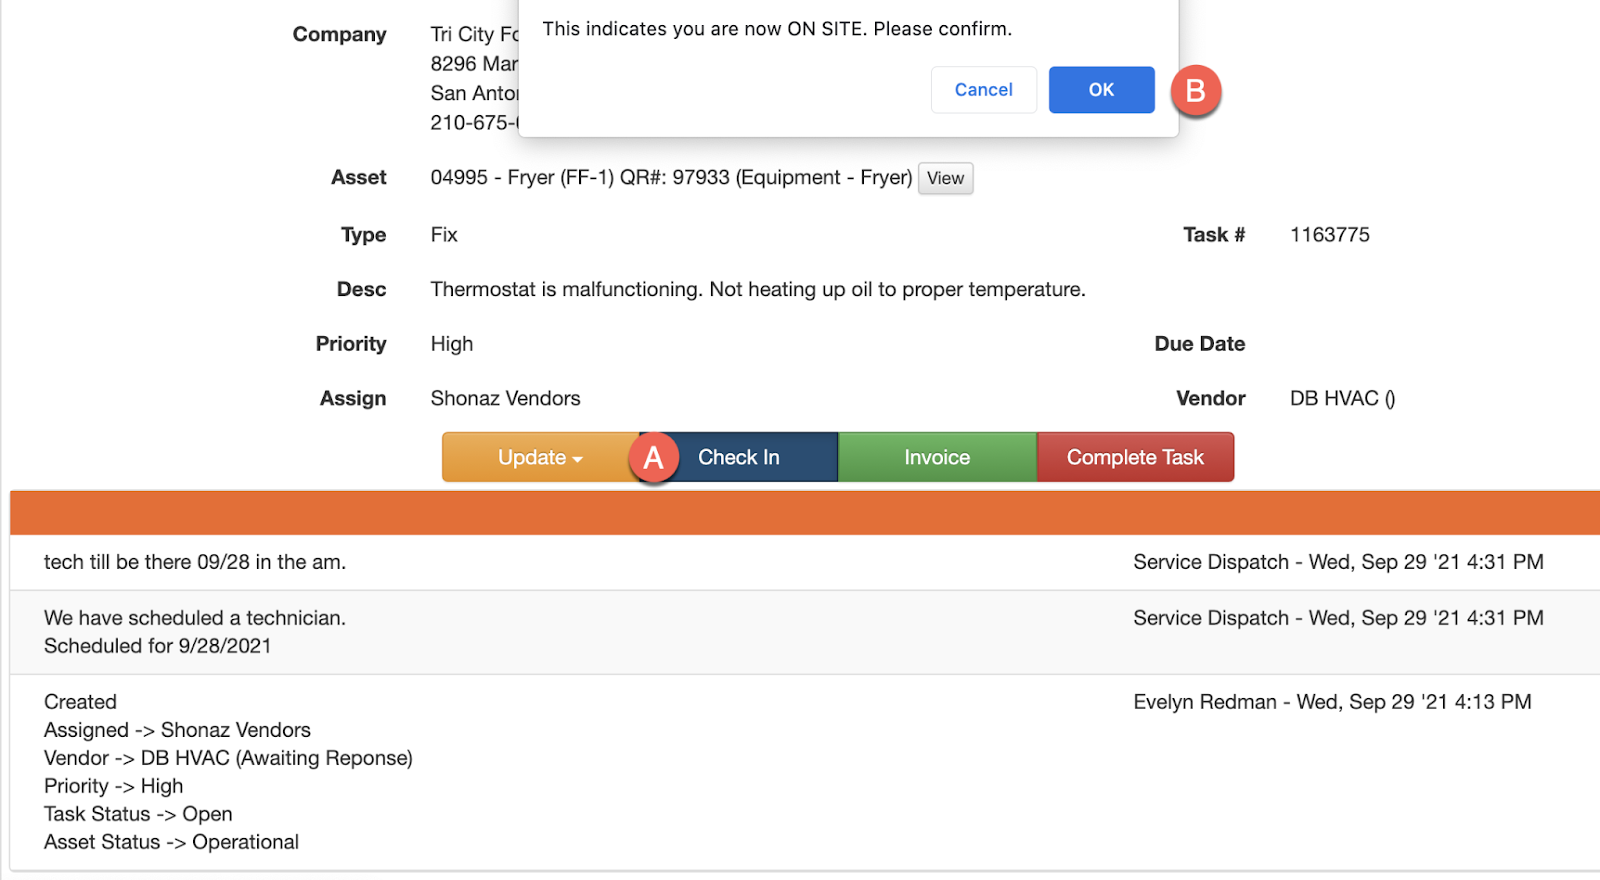
Step 2: Checking In On Site
Once you are on site and ready to begin the work, from the task screen select Check In and confirm that you are on site. This will create a time stamp that can be used for billing out to the store.
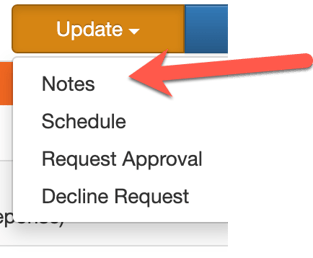
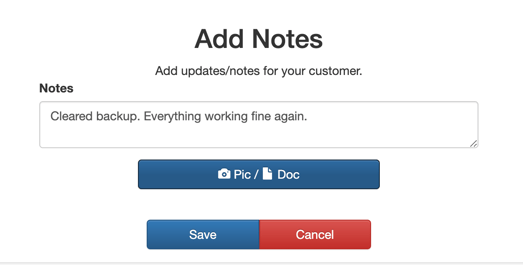
Step 3: Add Notes
Add any description outlining the status of the task (e.g. "All fixed, working again", "Need to order parts. Should be here next Tuesday", "Device failed, quote for new one attached".
Step 4: Completing the Task and Checking Out
Once the work is complete, you can add Notes describing the details of the work that was performed. When finished, select Complete Task and Check Out. This is will notify the customer with your updates, let them know that the work has been completed, and that you've left the job site.
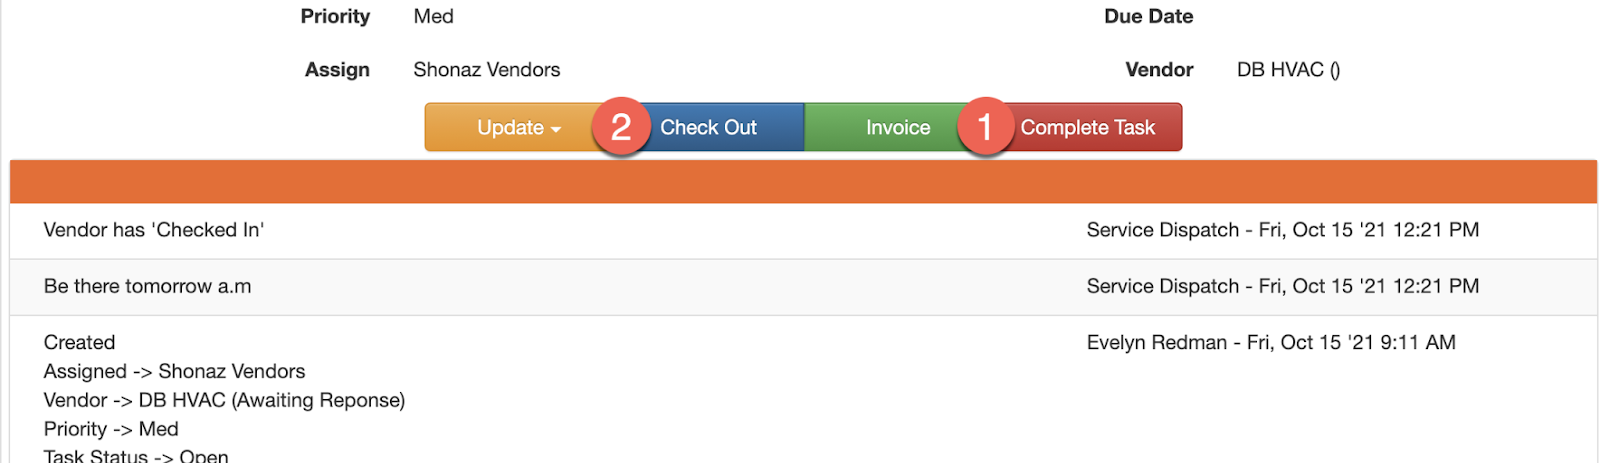
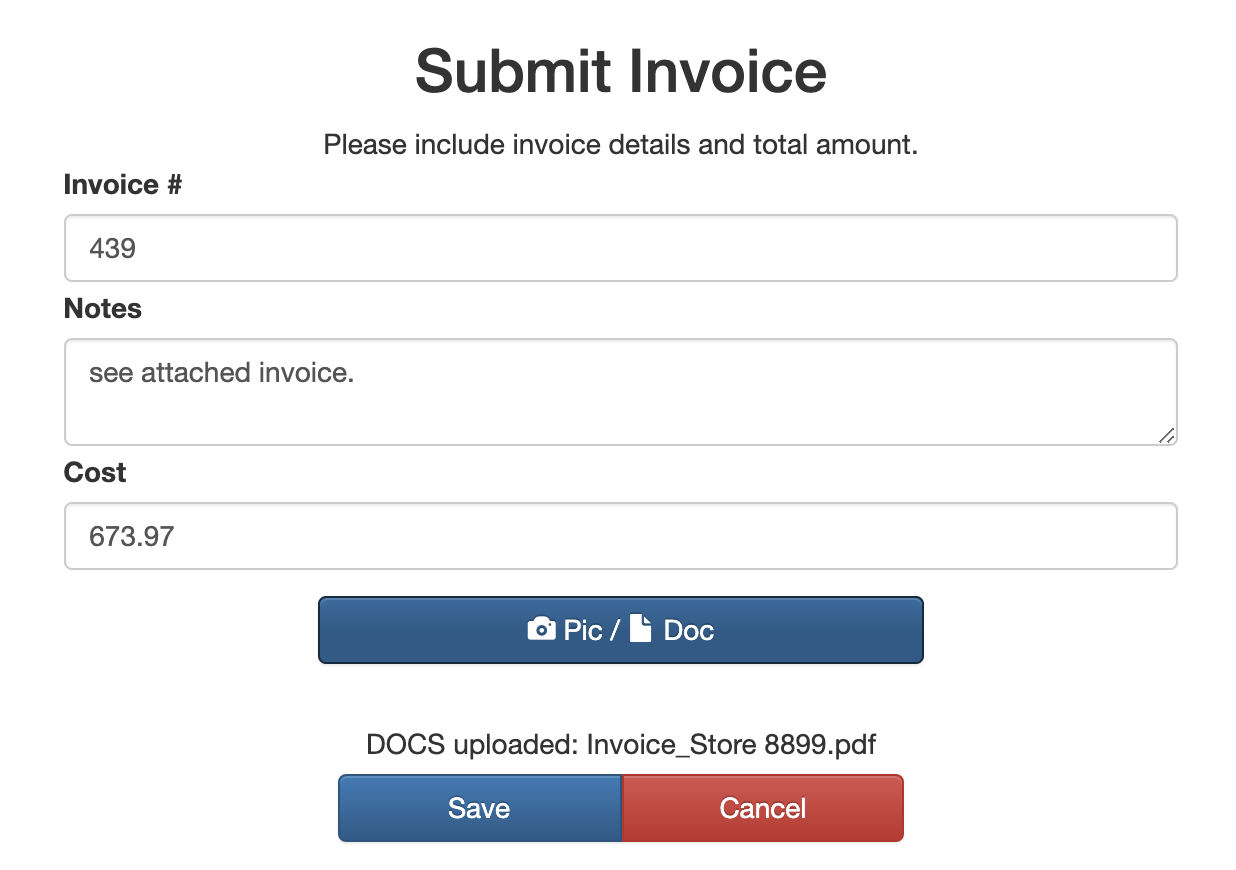
Step 5: Adding an Invoice
If you are required to submit an invoice, or add any additional documentation, you should do this to OwlOps too.

It's important to note that every restaurant group runs their operations differently. You should communicate directly with your customers to be clear on their expectations for you in OwlOps.