![owlops-2.png]](https://www.owlops.com/hs-fs/hubfs/owlops-2.png?width=197&height=75&name=owlops-2.png)
Sometimes you want to send the same task to many locations at once. For example, you may want all of your restaurants to prepare for spring cleaning or a holiday event, or follow proper PPE. You can do this with a Multi-Department Task.
Step 1: Choose Multi-Department
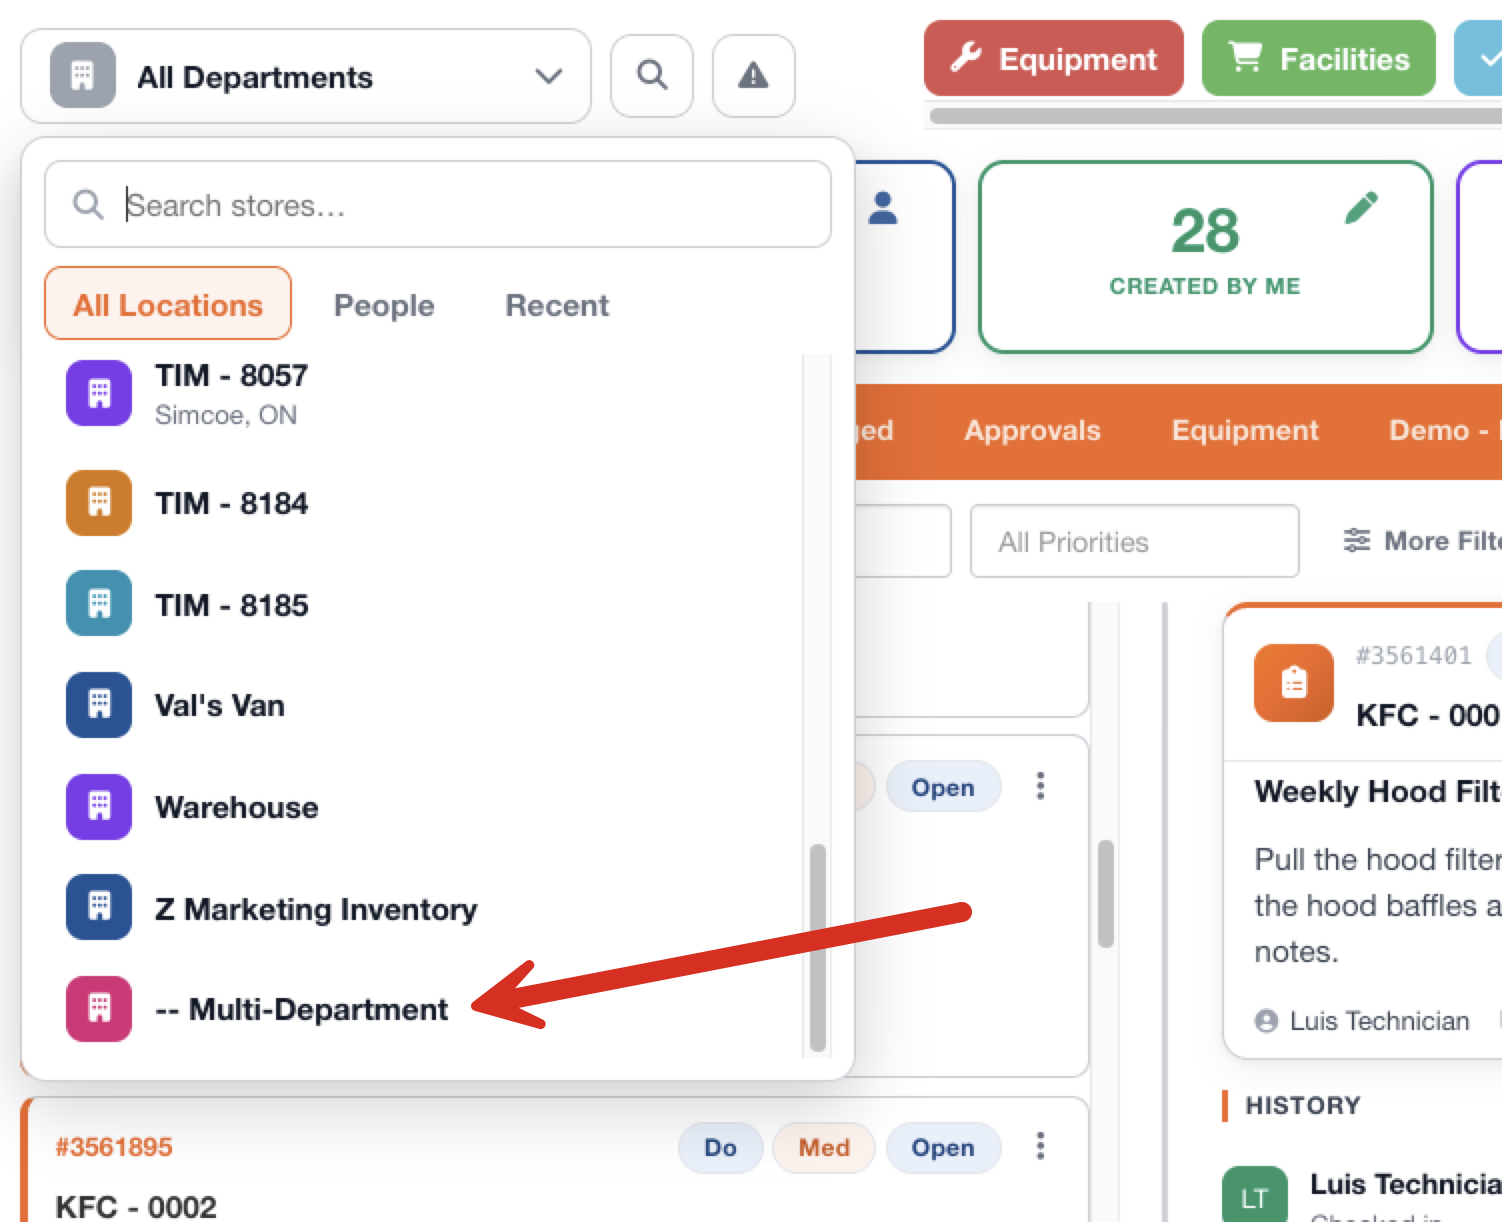
Go to Tasks, open the department picker at the top left, scroll to the bottom and select -- Multi-Department. Then click + New Task.
Step 2: Choose the locations
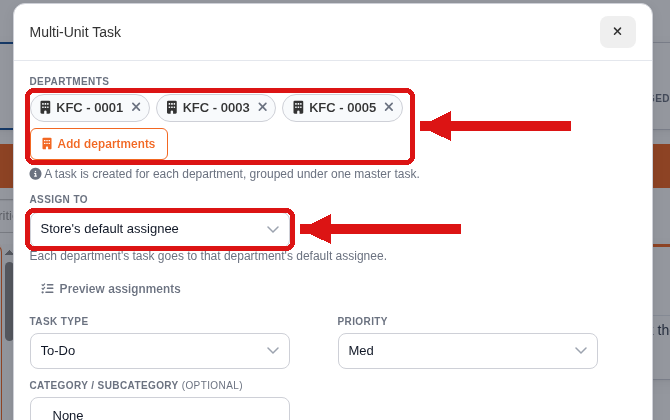
The Multi-Unit Task window opens. Under DEPARTMENTS, click Add departments and choose the locations that should get the task.
Under ASSIGN TO, choose who gets each location's task. With Store's default assignee, each location's task goes to that location's default assignee. Click Preview assignments to see who each one will go to.
Step 3: Fill out the task and create it
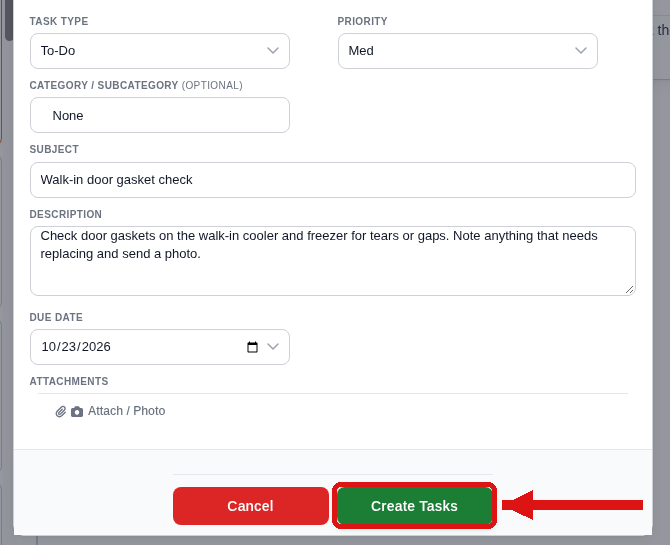
Fill out the rest of the task: TASK TYPE, PRIORITY, CATEGORY / SUBCATEGORY (optional), SUBJECT, DESCRIPTION, DUE DATE and any attachments. Then click Create Tasks.
Step 4: Follow the Master Task
OwlOps creates a task for each location you selected, plus a Master Task on your task list. Each location sees its own task on their task list.
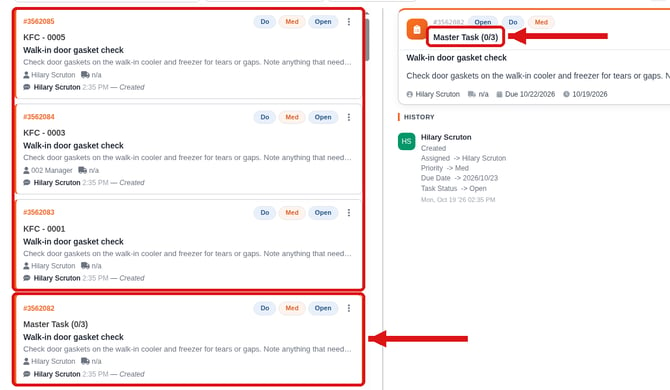
NOTE: The Master Task shows how many locations it was created for, such as Master Task (0/3). As the locations close their tasks, the count goes up. Once every location has completed the task, close the Master Task.