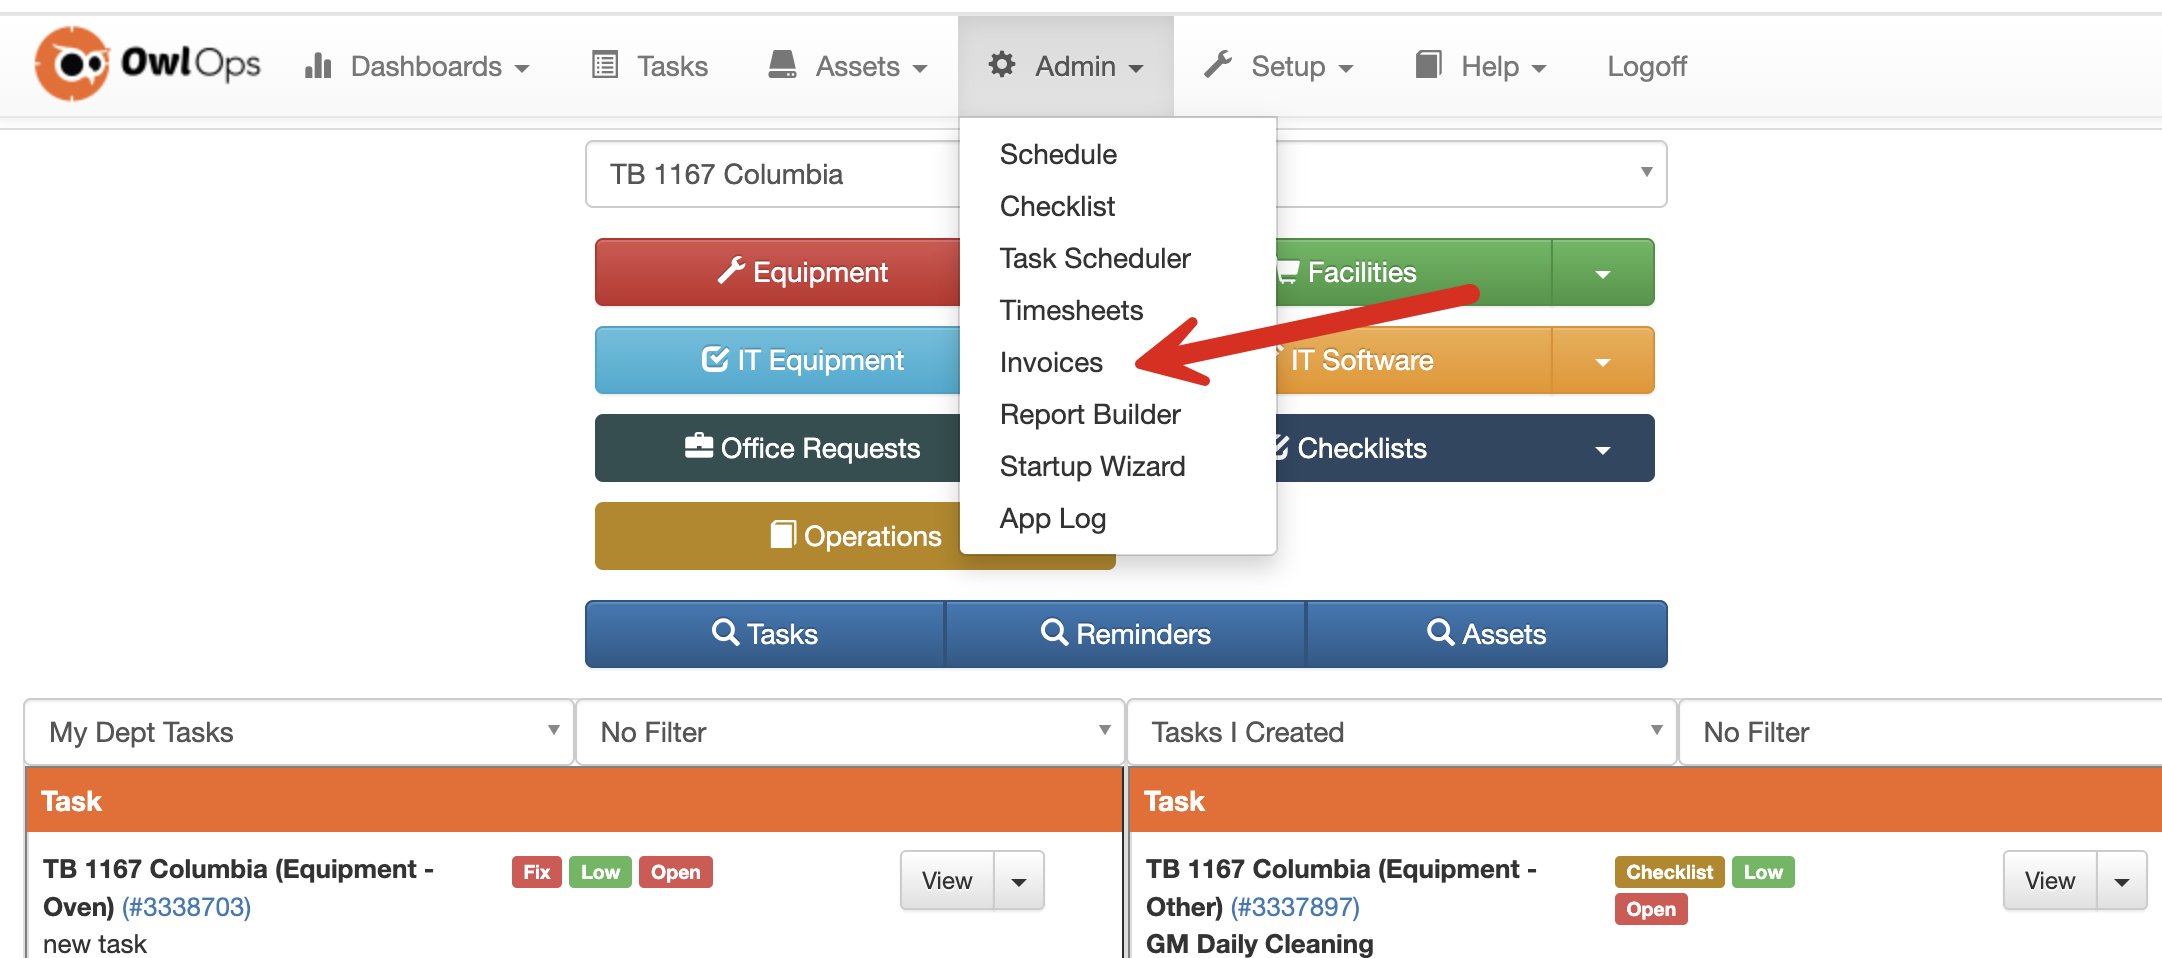
Step 1:
Go to Admin / Invoices.
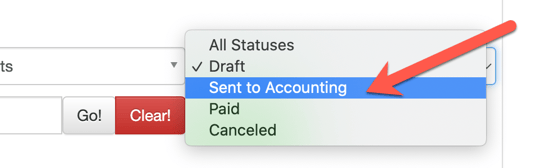
Step 2:
Using the filters at the top, change the status filter to Sent to Accounting.
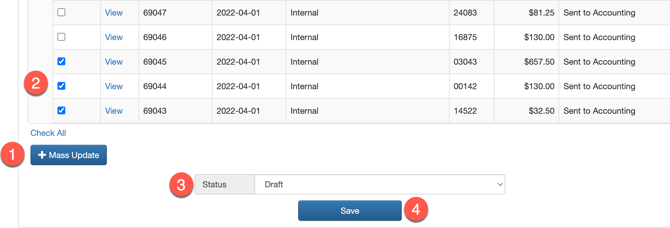
Step 3:
At the bottom of the page, select +Mass Update.

Step 4:
Select the invoices you need to edit using the checkboxes to the left. In the Status bar at the bottom, change the status from Sent to Accounting to Draft. Select Save.
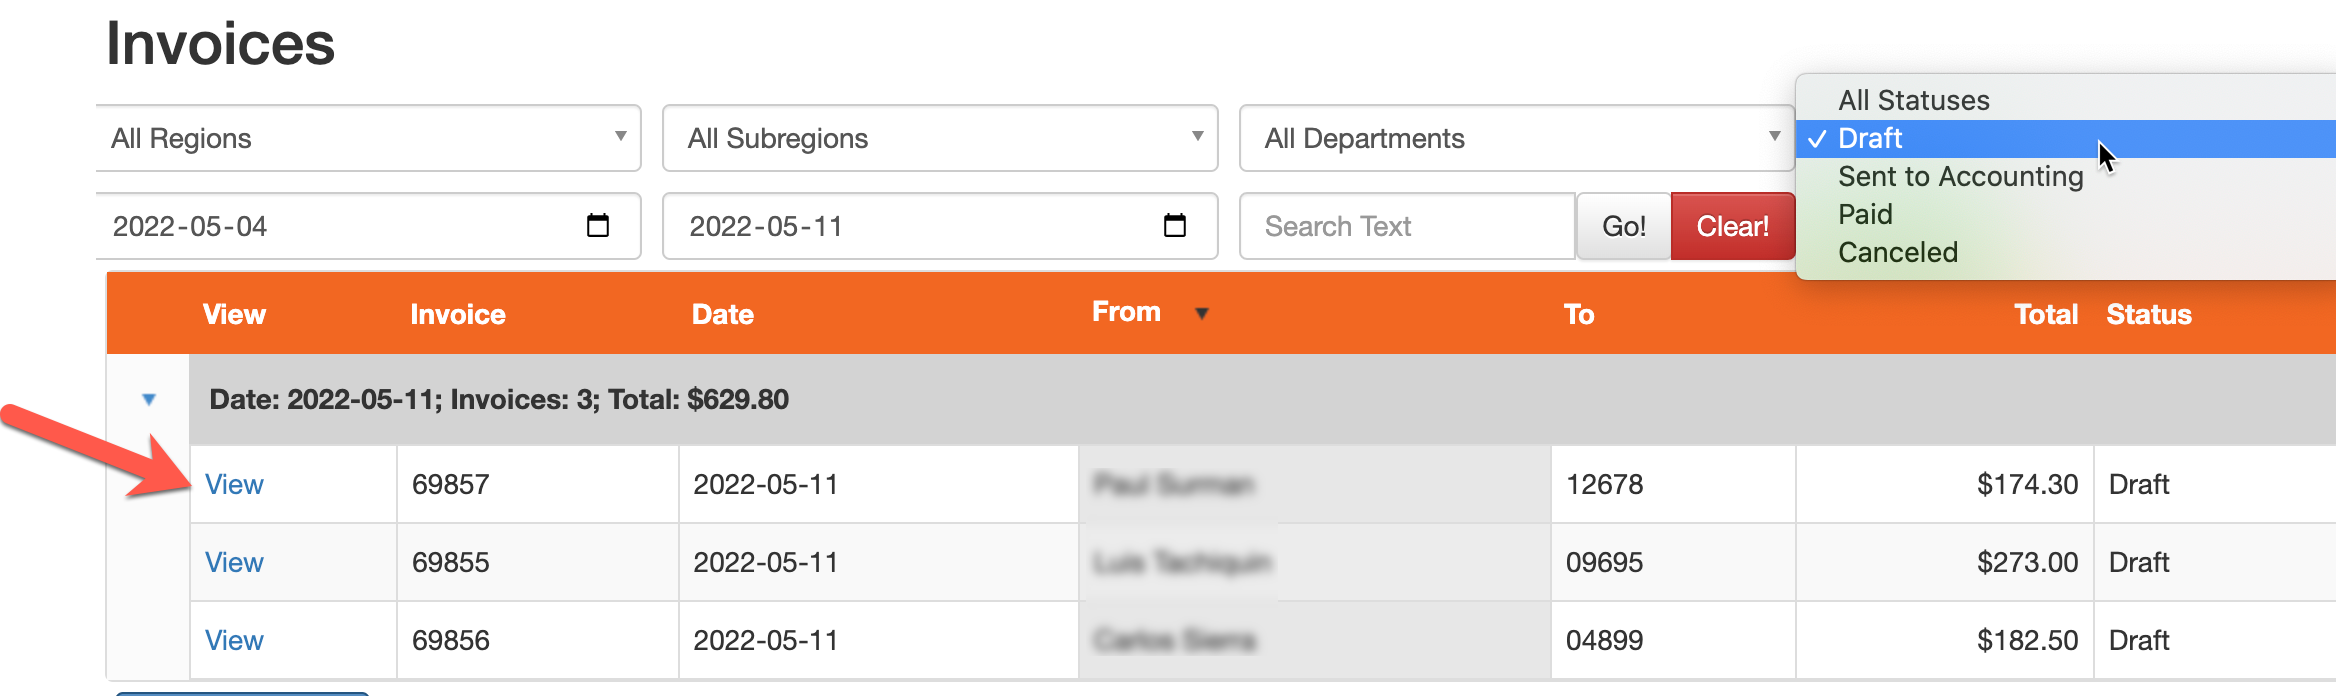
Step 5:
Using the filters at the top of the page, change the status back to Draft. You should now see the invoice in back in Draft mode. Select View.
Step 6:
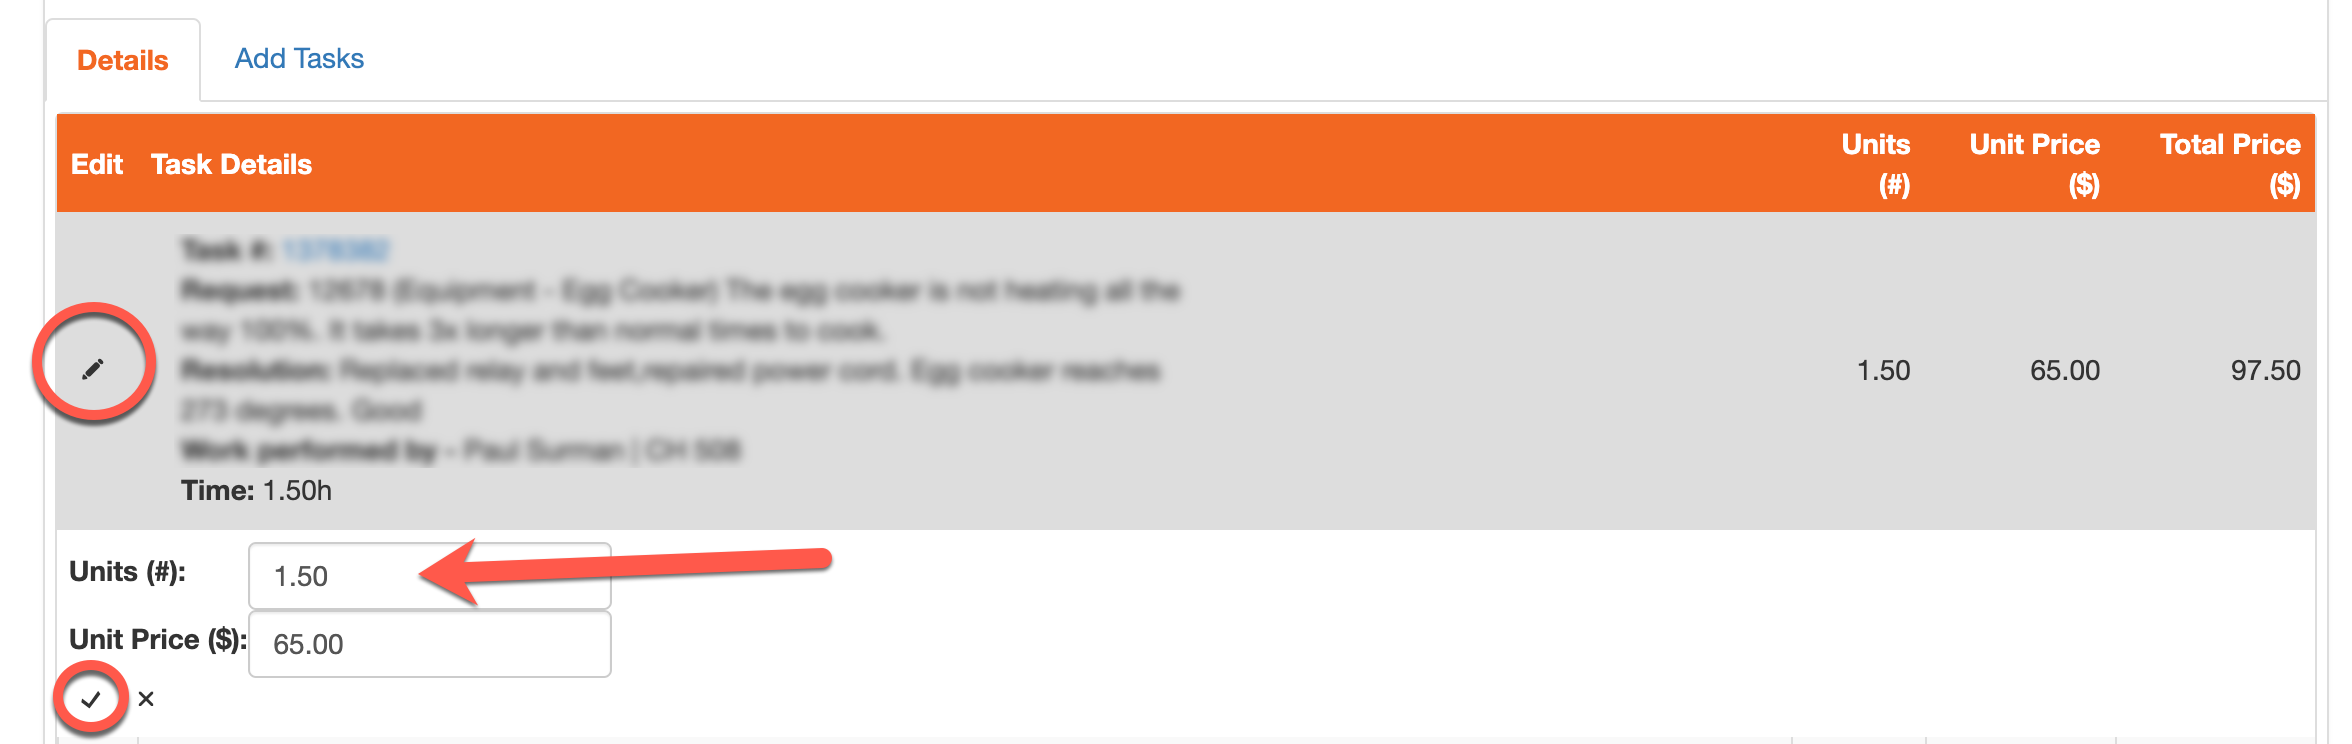
Select the edit icon on the left for line item(s) that need to be adjusted. Make changes and select the checkmark at the bottom.
REMEMBER TO LET ACCOUNTING KNOW THEY CAN DISPOSE OF THE PREVIOUS INVOICE YOU MADE CHANGES TO.
NOTE: Once you've completed these steps, the updated invoices will automatically be re-sent to the accounting based on your company configuration. email set up on your company profile.