It's important to keep track of your assets and equipment to know when repairs are getting costly and it might be time to replace. You can easily enter assets into OwlOps and assign tasks directly to that piece of equipment when something needs to be fixed.
To add an asset in OwlOps, follow these steps:
Steps
- Go to Assets/ All Assets

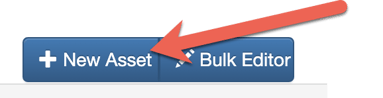
- Scroll to the bottom of the page. To add an individual asset, select + New Asset.
- Fill out all as much information as you have on the piece of equipment. **NAME AND DEPARTMENT ARE THE ONLY TWO FIELDS THAT ARE REQUIRED**
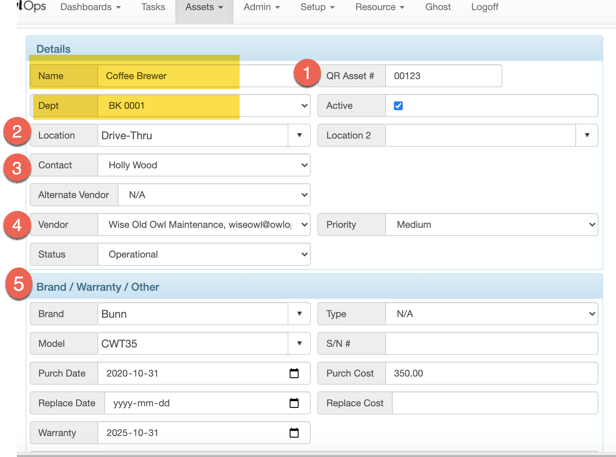
A. QR Asset # - Enter the OwlOps QR code identification number (or any other identification number you may already have).
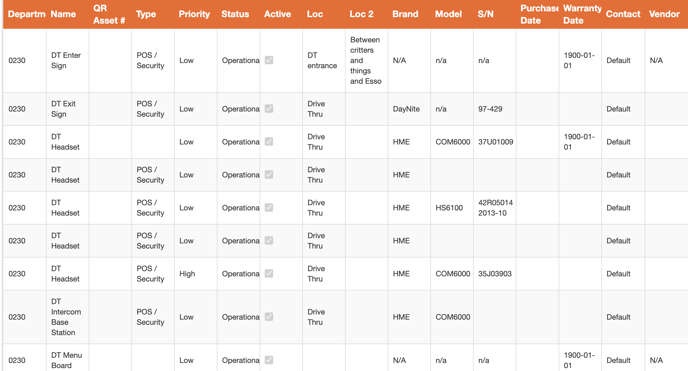
B. Location - If you have multiple of the same pieces of equipment in different locations of the restaurant, you can differentiate them by specifying the location in the restaurant (e.g. Drive Thru, Kitchen, Front, Back, etc).
C. Contact - Select the person who will be assigned when a task is created for that asset.
D. Vendor - Add the primary vendor who should be assigned (if applicable).
E. Brand/ Warranty/ Other - Enter any brand and warranty information so this information is stored in OwlOps. - To view all of your assets and make any edits, go back to the previous screen (Assets/All Assets) and select Bulk Editor at the bottom of the page.

- You can view all of your assets and fill in additional information as required by selecting individual cells.